Joomla websites are one of the best. They normally have many functionalities that you can use in different ways to create an e-commerce website, blog, ads classified website or general website. I want to share with you tips on how to use Joomla to make your website.
The fastest way to download it is through Joomla’s official site. Alternatively, if you already have a domain and hosting provider. Simply access the panel, then head to softaculous and search for Joomla then follow the installation instructions.
After downloading it from the official site, ensure you already have installed wamp or xxamp on your device. If its wamp, extract the Joomla files in wamp/www/mywebsite folder. Then head to your browser and access your installation folders in your browser through: “localhost” where you may then click your mywebsite folder or just type in localhost/mywebsite. Also, ensure you create a database that will be used for the Joomla installation. I
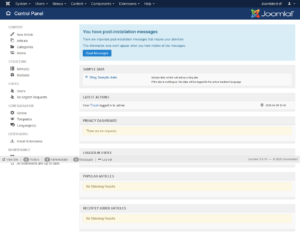
Once you are done, you will manage to access your Joomla website administration panel, through http://localhost/mywebsite/administrator/.
The administration panel
Once you have logged into the administration panel, check the menu bar which has various options: Systems, Users, Menus, Content, Components, and Extensions.
A) System menu
This consists of:
Control Panel – This is the front page of the administrative panel.
Global Configuration– You configure the general settings of the site from here.
Site Systems Server Permissions Text filters
Site
a) Site settings – Change the site’s name, offline message, and image
b) Metadata Settings- It entails the meta description of the site( short description of what the website offers), meta-tags, meta-keywords (the main keywords used in the site)
c) SEO settings – There are options to choose from to enable SEO user-friendliness, and to enable the title of the site to be seen on all pages.
d) Cookie settings
Systems
a)System Settings
b)Debug Settings
c)Cache Settings
d)Session Settings
Server
a)Database settings – This is where you can change the database settings in case you had installed your Joomla site on localhost, and now you want to transfer it to a hosting service.
b)Mail settings – You can change the administrator email from here.
c) Server settings
d) Location settings
e) FTP settings
f) Proxy Settings
Permission Settings
This is where permissions are allowed or disabled for groups of people who will use the site
Note: Under the Global configuration is where permissions for the components installed and those already there changes.
Global Check-in
Clear Cache
Purge Expired Cache
System Information
B) Users
User manager
This option is where you can add another user/ administrator who can be allowed to access the administration panel.
Add user groups; registered, public, guests, users, etc
Add user notes
Notes categories
C) Menus
a) Menu Manager
This option is where you can add a menu apart from the main menu. For instance; the Side menu, Footer menu.
b) Main Menu
This option is where you can add menu items; Home, about us, services, etc
How to create a new menu item:
In the Details option, you choose the type of the menu item, if it is a blog post, component, article or contact form then specify the particular one. The status should be published and unpublished if you don’t want the page to be displayed. In case you don’t want the menu item to be clickable and just have a sub-menus; you can use the hash # sign in the link option. If the menu item should be a sub-menu, the parent item should be indicated in the menu item root.
In the Link type option, you can either decide to include a link to the title or styling or not. You can also enable or disable the menu title from being shown.
In-Page Display option you can decide whether to allow the page heading to be visible or not.
In the Metadata option, you should write the meta-description and meta-keyword of the page. It is necessary to include them.
Module assignment
D) Content
Article Manager
Add new article: This is where you can write the content you want to display on each page.
Add a new category: You can create as many categories as you would wish in this option. The articles can be placed in various categories.
Featured articles: These are the specific articles that you would want to be displayed on the homepage.
Media Manager: Uploading of media files is done with this option.
E) Components
These are extensions added to Joomla to add functionality to a website. For example; shopping cart, blog factory, messages, ads manager.
F) Extensions
Extension manager
Install Upload themes, modules, and components in this section. Nevertheless, they should be compatible with the Joomla version you are using.
Update: Displays items that have a pending update
Manage: Unwanted themes, components, extensions, and modules can be deleted and managed here.
Discover: It shows the extensions that were not installed in the normal way.
Database: Gives finer details about the status of your site’s database.
Warnings: Highlights the errors and warns the administrator of what might have gone wrong.
Install languages: Installation of various languages is done here.
Update site
Module manager
Configuration of modules installed is done here;-
The positioning of the modules (right, left, top, footer, and bottom)
Status (published or unpublished)
Menu assignment (Choose where the module will be featured and where it won’t be featured)
Plugin Manager
Manage the plugins from here (publish and unpublish unnecessary plugins)
Template Manager
Choose a default template and change its styling to suit your preference.
The default template is the one you’ve decided to use.
Codes for each template are visible and easily accessible.
Language Manager
The installation of languages is done here.
G) Help
For inquiries, support, queries, and help from the Joomla community of developers
NOTE
Enable to view template module positions in template manager options.
To view the positions in your default Joomla template has; type your site’s name for example www.mywebsite.com/?tp=1
If you need further solutions, talk to us
I hope the guideline was helpful and will help you once you start using Joomla. All the best in all your endeavors. 🙂
Trizah provides writing assistance (blog writing, web content writing, e-book writing, technical & documentation writing, ghost writing, copy writing & other writing forms), coaching, web development, market research, product research, app testing, and virtual assistant services.
Her educational background in writing, website design, and community development has given her a broad base from which to approach many topics. She has also worked independently on Upwork. She also enjoys embracing innovations, art and new designs 🙂 Hire Trizah for your online freelance services today!
X (Formerly Twitter)||Linkedin||Medium||Instagram
My blogposts can be found here.
Discover more from Intela Designs
Subscribe to get the latest posts sent to your email.
2 Responses
Thanks for another wonderful article.
I¦ve recently started a site, the info you offer on this website has helped me tremendously. Thank you for all of your time & work.