Wix is among the best website builders on the internet. It has awesome customized features that you can use to make a website of your choice. You wouldn’t believe the number of beautiful websites on the internet that have created been created with Wix. When I learned how to use Wix, I was happy because I realized it is an easy DIY task.
However, it is not as easy as you might think. If you don’t know the various tricks and tips you can easily get stuck and not know what to do. Wix website builder is readily available, accessible, and credible. You also need to know how to host a website to ensure you can resolve any issues that might come your way.
How to use Wix to create a website
Step 1: Create an account
The first thing you need to do is create an account. If you want to use the Wix site for business, it’s recommended to use your business email address. However, if you just need it for personal reasons, you might as well just decide to use your email. There is no harm in that. Use valid details because credibility is important in all platforms.

Step 2: Chosen niche
It will then redirect you to a page that requires you to input what you want to use the website for. Thus, you need to be sure of what you desire the website to be for. Be it a personal blog, or an online store just name it. Also, if you can’t find the specific niche that you want, choose something that is closer. The beauty is that you can customize the site to look as you wish.
Step 3: Build for yourself or Use ADI website creator
Having chosen the niche of your choice, you will be redirected to a page. You can either decide to make the website on your own or use ADI website creator which will easily create a site for you. ADI Practically does most of the work for you, and you will only be required to do a few things here and there. There is also the option of getting professional help from the Wix team.

Step 4: Create a website
If you decide to create your own website, you will then be redirected to a page to choose a template that you desire. Thus, browse through the various templates to see which one suits your preference most. Don’t mind about the design, because you can change that while editing. However, choose one that pleases you the most.
How to use the various menu bars
-
Left menu bar
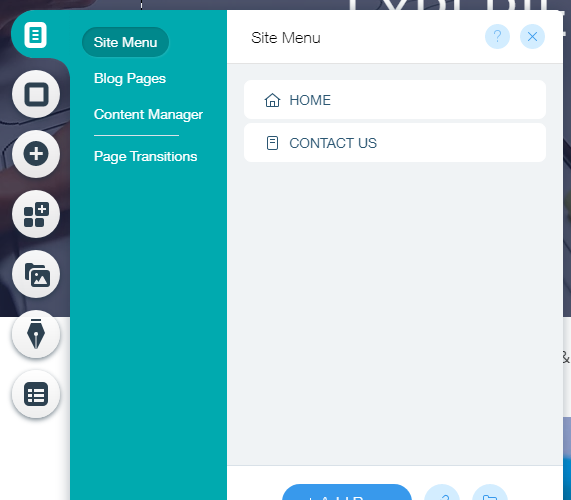
i) Menus and pages
This is the section that allows you to choose an already existing page or create a new page to edit. You can either decide to add a page, add a link, or add a drop-down to the menu on your website. Any edits made on the header or footer applies to all the pages. If you want to have a page without the header and footer, it is recommended to hide them.” Just click on the three dots on each page title and choose an option”.
Also, ensure when editing the pages, you work within the gridlines. If you add content outside the gridlines, they will overflow in your website. You can also choose the page transition on how the page should be loaded.

ii) Page background
In this, choose the kind of background you need for your website. When designing a website using Wix ensure that the text color you choose rhymes with the background to prevent your target audience/visitors from having trouble. You can choose to have a color, video, or image as your background. If you need the page background to apply to all pages, ensure you click on the CTA to apply to all.
iii) Add
This allows you to add a variety of things; images, videos, buttons, text, vector art, gallery, content manager, shape, box, strip, lists, music, social media icons, input, blog, store, lightbox, forms, and other more. It mainly depends on what features you desire your website to have. If you want to have a popup when one loads your image. You may use a lightbox that requires minimal details, but is essential in campaigns and providing certain important information.
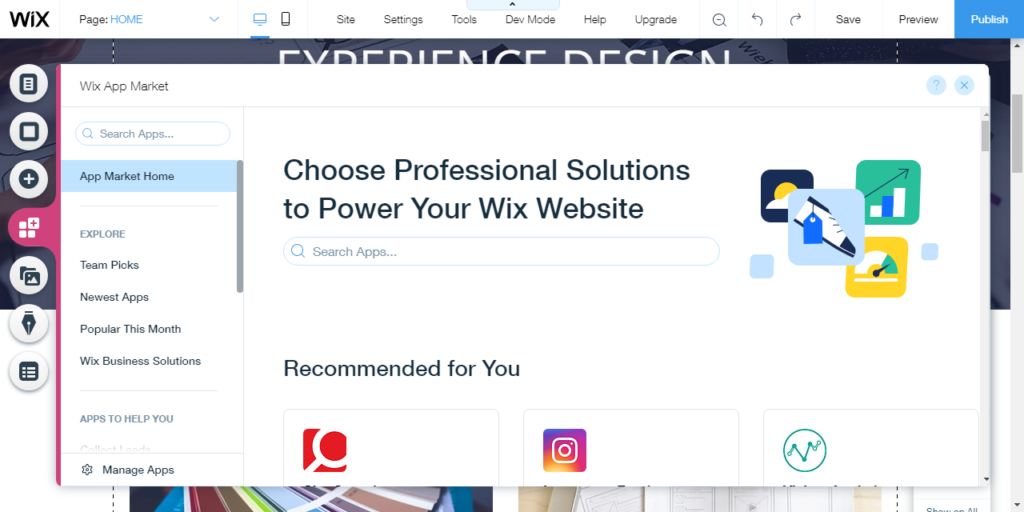
iv) Wix app market
You can browse through the web applications to see what suits you.
v) Media
It contains all the theme’s media and uploaded media. You can even edit the images to form videos and so on. There are many features you can choose from that. Make your website as presentable as possible.
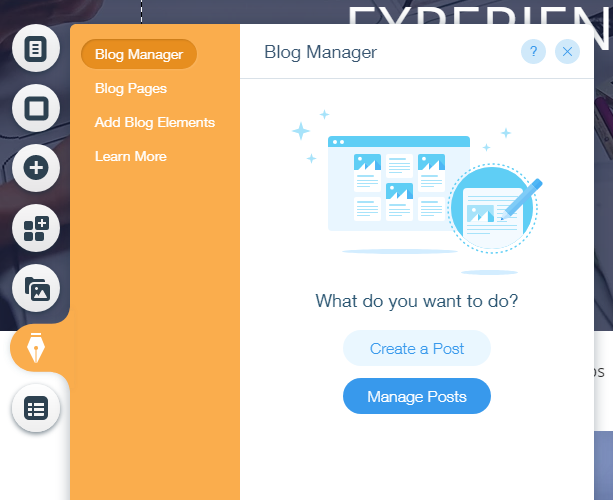
vi) Blog manager
In this section, you can choose how you want your blog section to look like. You can add blog pages and ensure that the posts are aligned well.

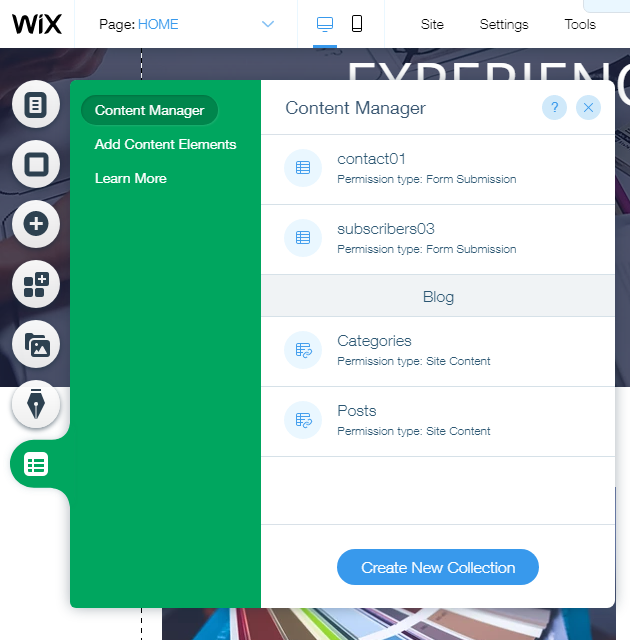
vii) Content Manager
In this section, you can arrange your content and the items you want to be visible and those you don’t want to be visible. You can also choose permission to give for various pages.

-
Top Menu bar
i)It is recommended to edit the website in a desktop view. After you are done, edit with the mobile view to see how the website will be seen on different devices.
ii)The site section allows you to save the site, publish, or any general functions.
iii) You can decide to turn on the dev mode or turn it off.
iv)Choose the tools you want to use to make your website; rulers, gridlines, toolbar, layers, and snap to objects.
v)At the top right there is the save, preview, and publish that are essential in modifying the site.
-
Right menu bar
The right menu bar allows you to change the width and height of various sections. This also allows you to copy and paste any of the sections using any of the controls. The menu bar also allows you to arrange, align, rotate, flip, duplicate, or delete various sections. You can also change the position of the containers, strips, or media on the website.
You can also check these tutorials on:
How to make a website using WordPress
How to make a responsive website using Joomla
I hope this was helpful, be sure to try to make a website using Wix or talk to us to make it a reality for you. 🙂
Trizah provides writing assistance (blog writing, web content writing, e-book writing, technical & documentation writing, ghost writing, copy writing & other writing forms), coaching, web development, market research, product research, app testing, and virtual assistant services.
Her educational background in writing, website design, and community development has given her a broad base from which to approach many topics. She has also worked independently on Upwork. She also enjoys embracing innovations, art and new designs 🙂 Hire Trizah for your online freelance services today!
X (Formerly Twitter)||Linkedin||Medium||Instagram
My blogposts can be found here.
Discover more from Intela Designs
Subscribe to get the latest posts sent to your email.
5 Responses
I’m really impressed with your writing skills as well as with the layout on your weblog. Is this a paid theme or did you modify it yourself? Either way keep up the nice quality writing, it抯 rare to see a nice blog like this one today..
We used a certain theme and modified it ourselves.Thank you for the feedback.
Good write-up, I am normal visitor of one抯 web site, maintain up the nice operate, and I am going to be a regular visitor for a lengthy time.
Howdy! I just want to give an enormous thumbs up for the nice info you have right here on this post. I will likely be coming again to your blog for more soon.
Hi there! I simply would like to give a huge thumbs up for the nice data you have here on this post. I shall be coming again to your blog for extra soon.